Knowledgebase Article
Setting Up Sales Tax
Category: Configuration | Module: OfficePro | Created: 9/5/2026 | Last Updated: 9/5/2026
Sales tax in OfficePro is built from three pieces. Set them up in this order and the rest follows.
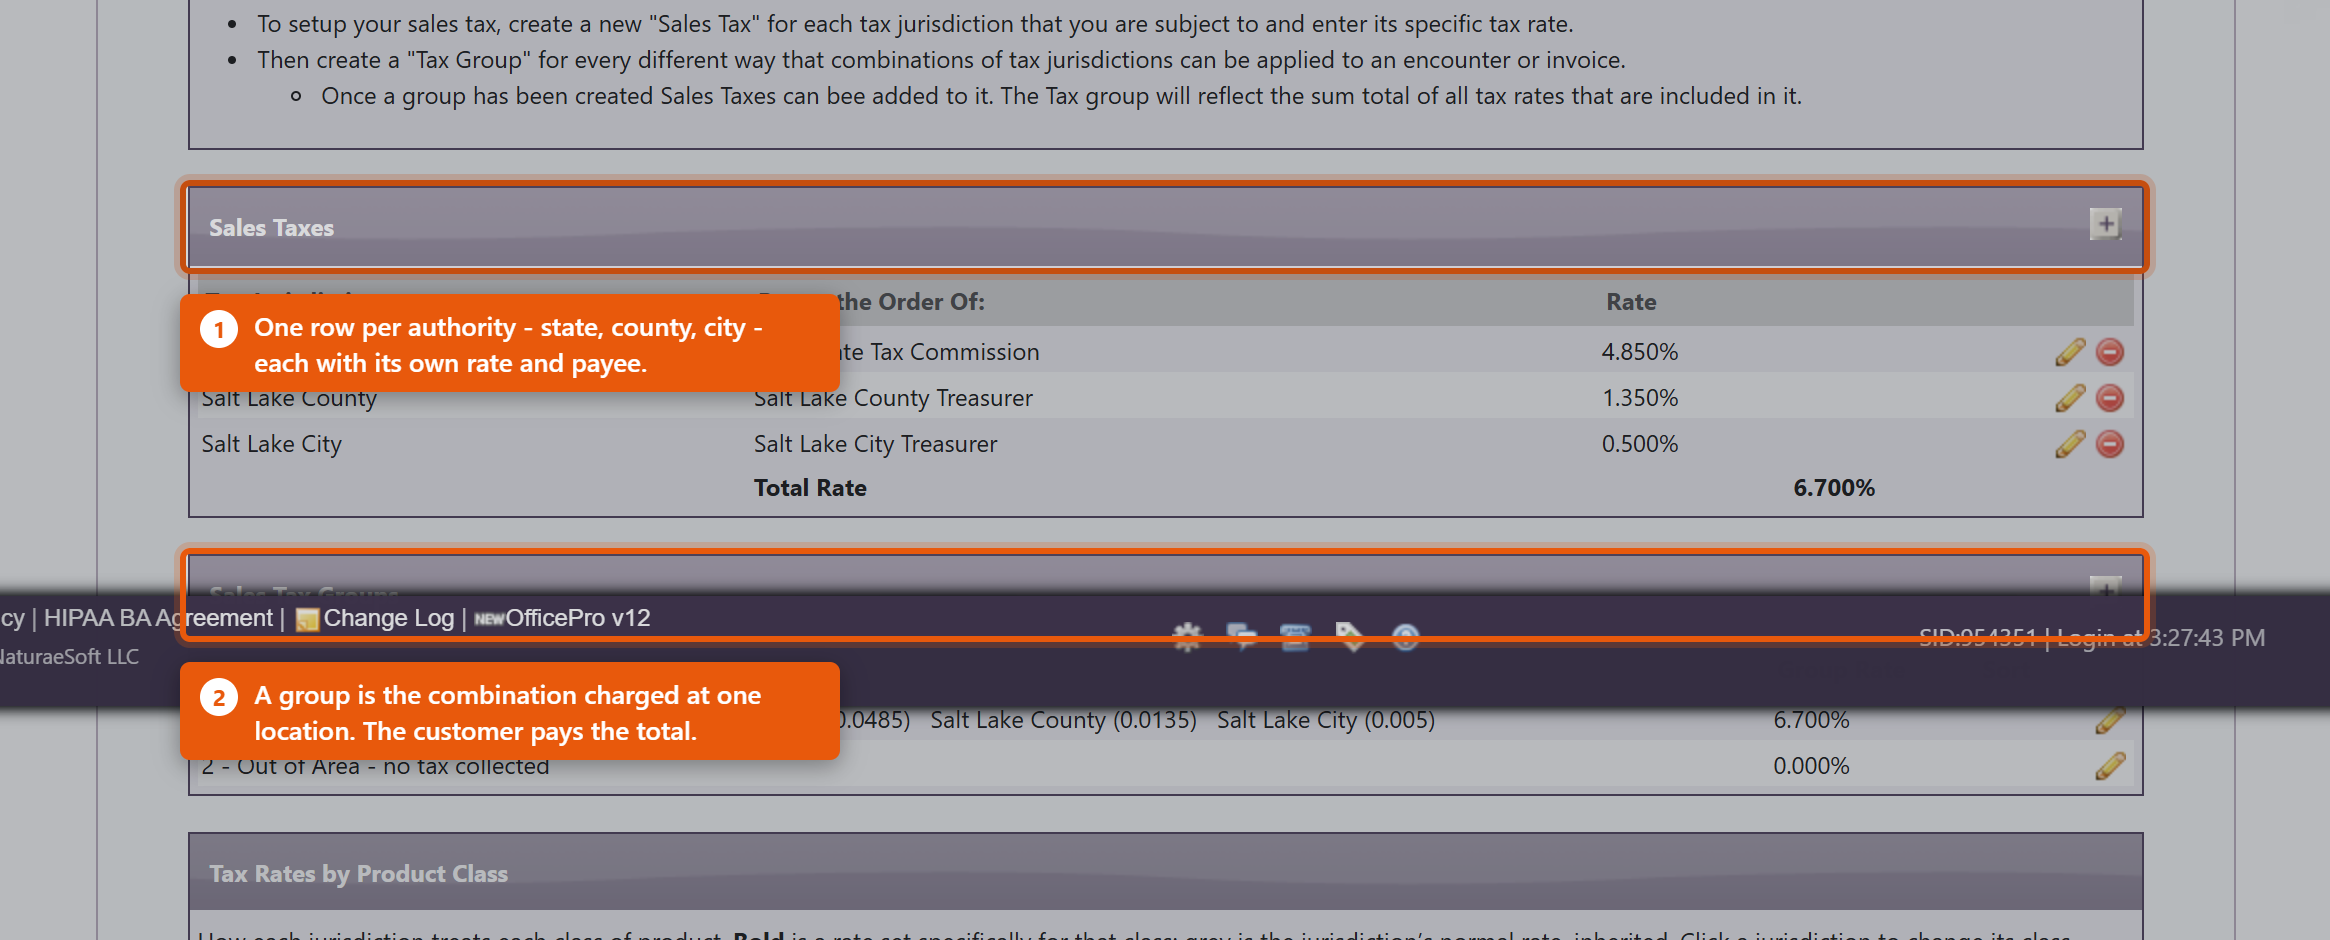
- A tax jurisdiction is one authority that levies a tax - a state, a county, a city - each with its own rate and its own cheque payee.
- A tax group is the combination that applies at one location. A clinic usually charges state plus county plus city, so the group holds all three and the customer is charged the total.
- A ship-to region decides which group applies to an order, based on where it is going.
Everything below lives on the Admin page, under Sales Tax Setup Information.
1. Add each jurisdiction
- In Sales Taxes, click Add Tax Authority.
- Tax Authority - the name you will recognise on a return, such as Utah State or Salt Lake County.
- Tax Rate - enter this as a decimal, not a percentage. 4.85% is 0.0485. Typing 4.85 would charge 485%. The screen warns you if a figure looks like a percentage, but check it yourself.
- Pay to the Order Of: - who the cheque is written to when you remit. This appears on the sales tax report and saves hunting for it later.
Add one row per authority. Do not add a single combined row for "sales tax" at the total rate - you will not be able to break the figure down by authority when you file, which is the reason for keeping them apart.
2. Build the groups
- In Sales Tax Groups, click Add Tax Group and give it a name that describes a place, such as Clinic - Salt Lake City.
- Open it with Edit Tax Group, then use Select Tax to Add and Add Tax to Group to attach each jurisdiction that applies there.
The Group Rate column shows the combined figure. Two things to know about it:
- It is a stored summary, refreshed when somebody opens the group and saves it. If you change a jurisdiction rate, the group total can look stale until you do.
- What a customer is actually charged is always the sum of the jurisdictions in the group, not that stored number - so a stale Group Rate is a display problem, not a billing one. Open and save the group to bring it back in line.
A group with no jurisdictions is a real, useful setting, not an unfinished one. It means "no tax here", and it is how you handle orders shipped somewhere you have no obligation to collect. Most practices want exactly one of these.
3. Say where each group applies
Under Ship-To Regions, click Add Ship-To Region and pair a Destination with the tax group it should use. The Everywhere else row is the catch-all for any destination you have not named - point it at your no-tax group unless you genuinely collect tax nationwide.
When an order is placed, the destination decides the group, the group decides the rate, and the rate is worked out and saved onto that line.
Changing rates later does not rewrite history
This is the question every administrator asks first, so to be plain: editing a rate does not change what past orders charged. Each line stores the rate applied when it was created. Put the new rate in on the day it takes effect and past sales, refunds against them and your filed returns all keep the figures they had.
The one thing to be careful of is the reverse: because only one rate is held per jurisdiction, a report that recalculates tax from today's configuration rather than reading what each line stored will misstate a closed period. Read the sales tax report, which uses the stored figures.
Before you rely on it
- Ring up one test sale for a taxable product and check the tax against a rate you have verified independently.
- Do the same for an order shipped out of area, and confirm it comes out untaxed.
- If you sell anything taxed at a reduced rate - groceries and supplements in many states - read Sales Tax by Product Class before going live. Leaving that unset charges those items at the full rate.
Rates and rules are set by your tax authority and change without telling you. OfficePro charges what you configure; confirming what to configure is your accountant's job, not the software's.